

Airtable Setup Guide: Create Account, Workspace & Get Your API Key
I use Airtable a lot — mainly as a database for AI agents, n8n, and other automation workflows. The more I use it, the more I realize I need a dedicated setup guide that other posts can reference. This is that foundation post — any tutorial in the series that involves Airtable will link back here instead of re-explaining the same setup every time.
One important heads-up: Airtable deprecated the old API Key in February 2024. You now need to use a Personal Access Token (PAT) instead. If you're following a tutorial that tells you to grab an API key from Account Settings — skip it. That approach no longer works.
What Is Airtable & Why Do You Need an API Key?
In plain terms, Airtable looks like Google Sheets but works like a real database underneath. You can create tables, link data between them, filter and sort any way you want — all through a drag-and-drop interface, no code required.
Airtable has over 500,000 customers across industries — eCommerce, project management, content planning, you name it. I personally use it as the central database for a 7-website ecosystem, connected to n8n to automate daily workflows.
What's the API key for?
You don't need an API key to use Airtable through the web interface. But if you want to connect it to other tools — n8n, ChatGPT, Claude, Zapier — you need a "key" that lets those tools read and write data in Airtable on your behalf.
That key is the Personal Access Token (PAT).
Each token can have specific permissions: read-only, write-only, or both. You can also scope it to specific bases instead of your entire account — much safer than the old API key, which gave full access with no way to limit it.
Create an Airtable Account
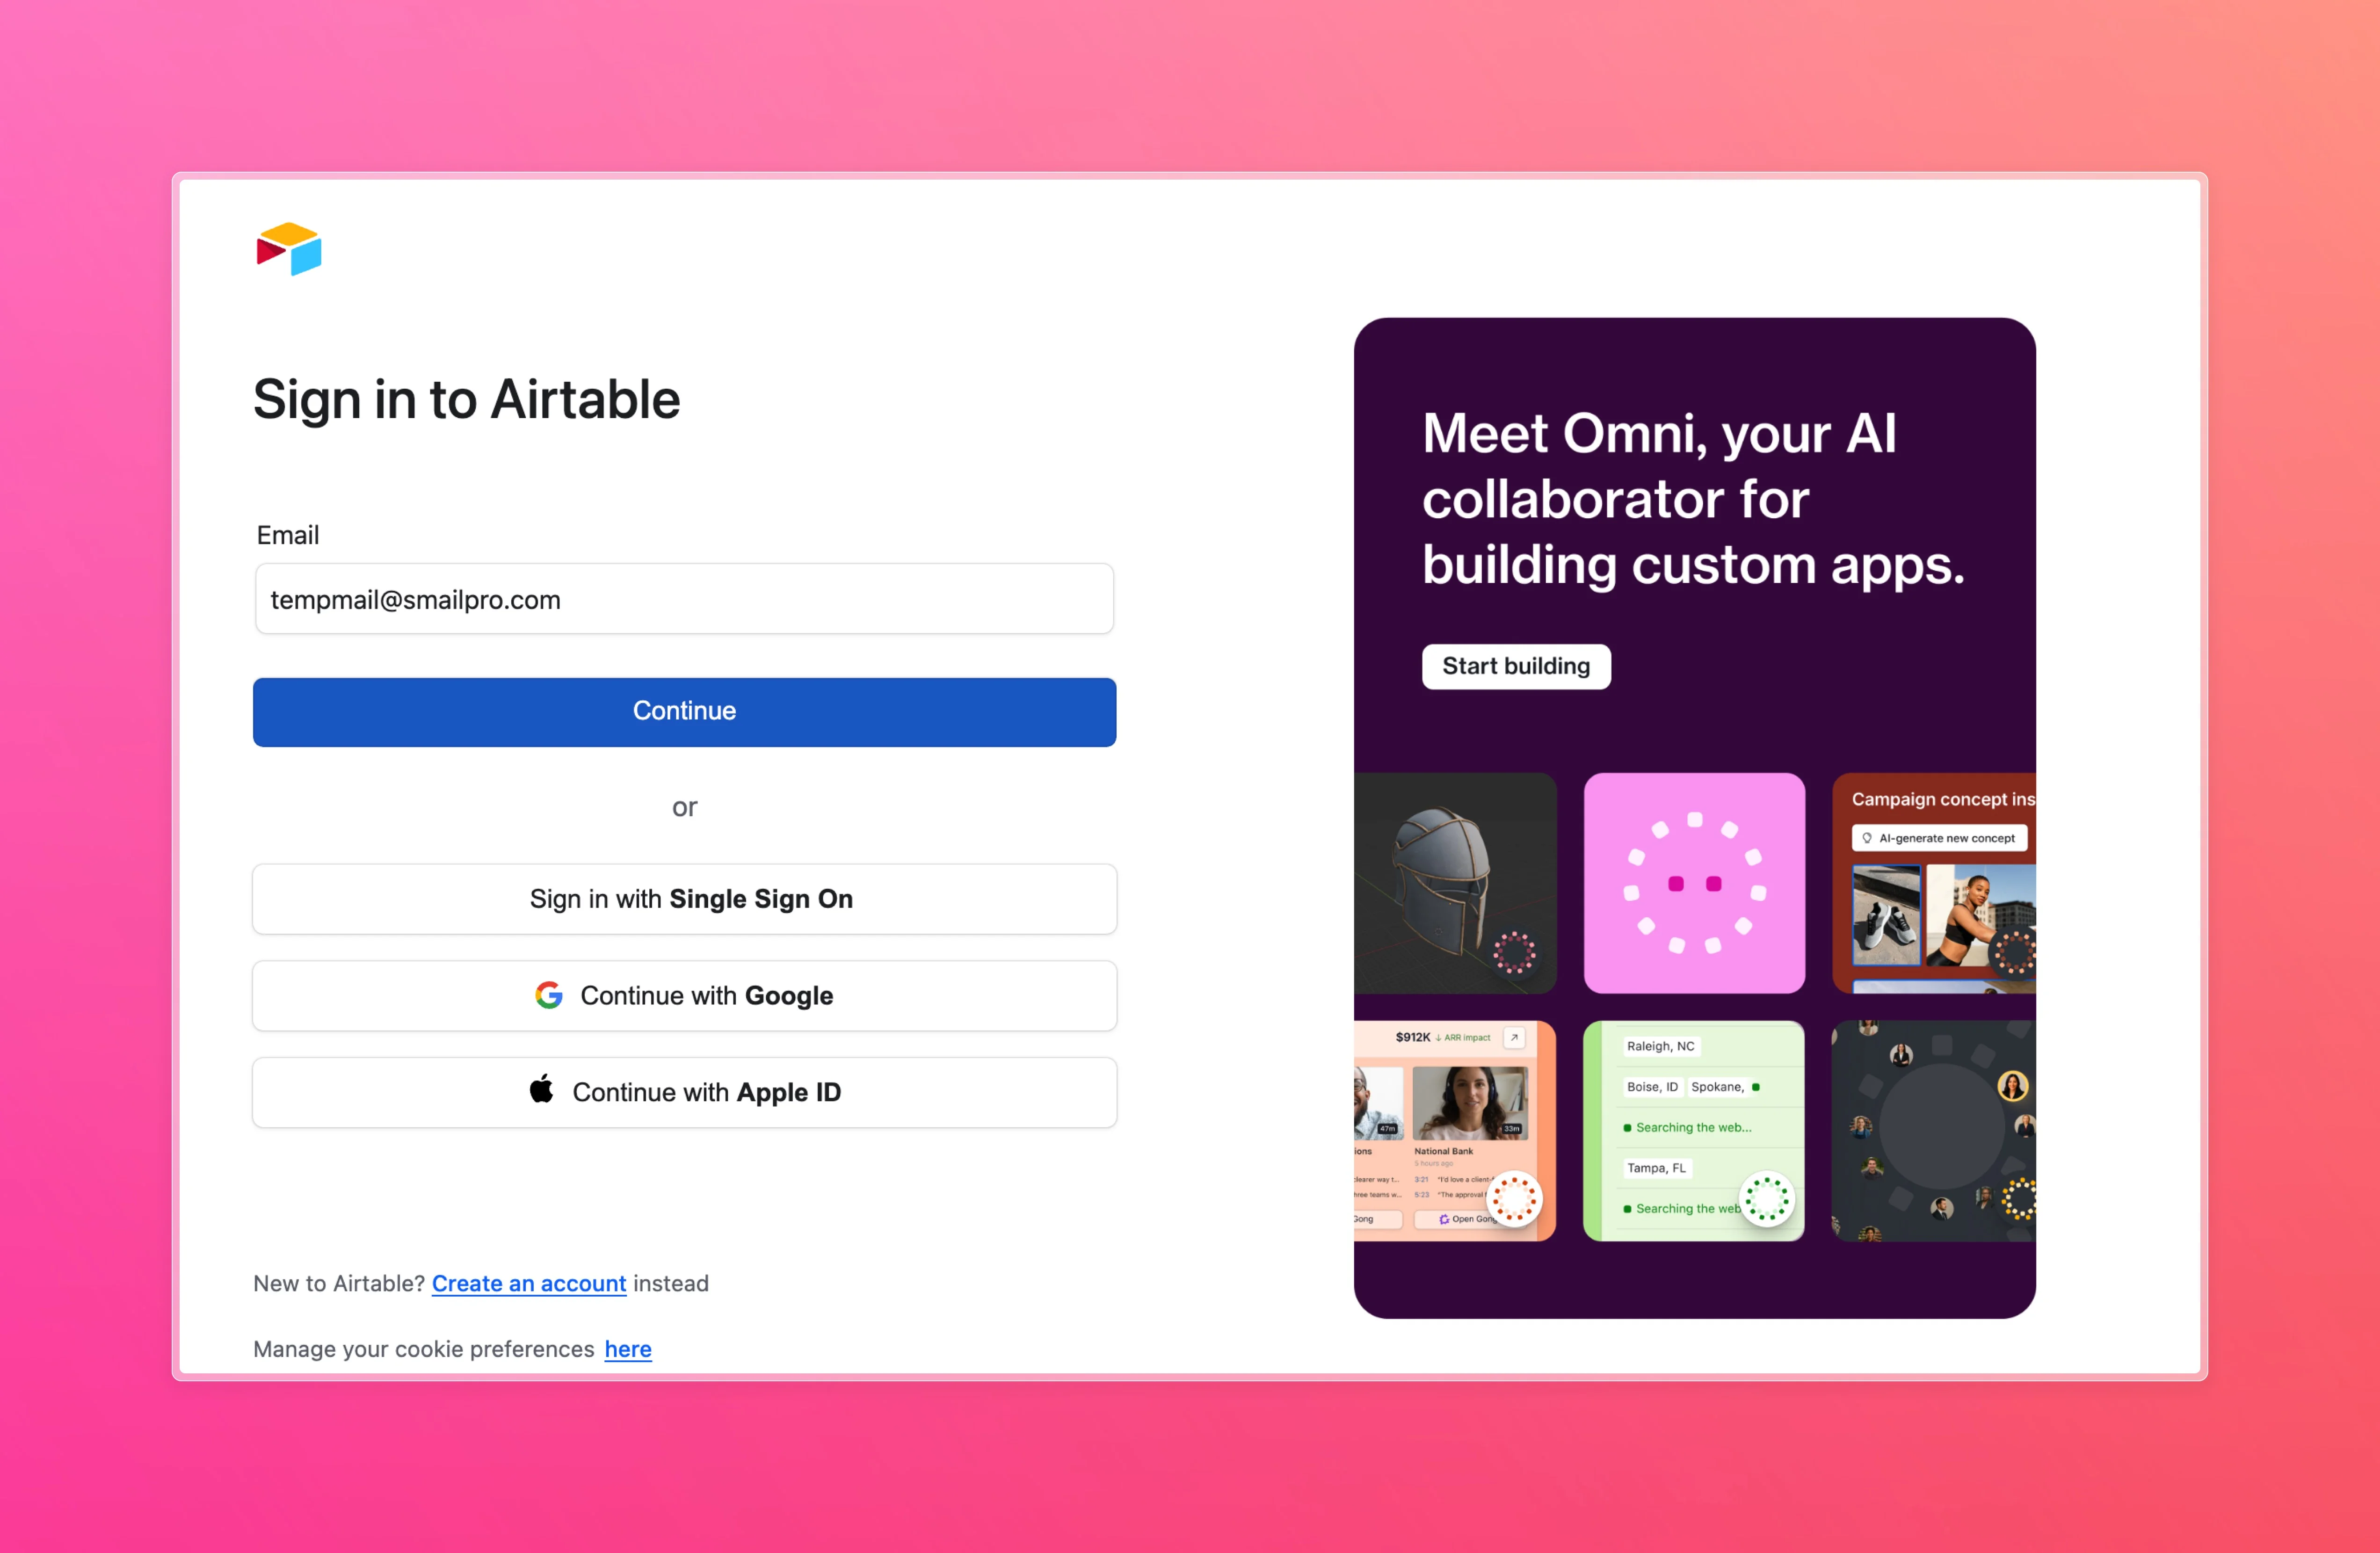
Go to airtable.com and click Sign up for free. No credit card needed.
Two ways to sign up:
- Google account — fastest option, done in one click
- Email + password — if you prefer keeping accounts separate
I'd recommend the Google account for convenience. After signing up, Airtable asks a few questions about your use case — you can skip them all, they don't affect anything.
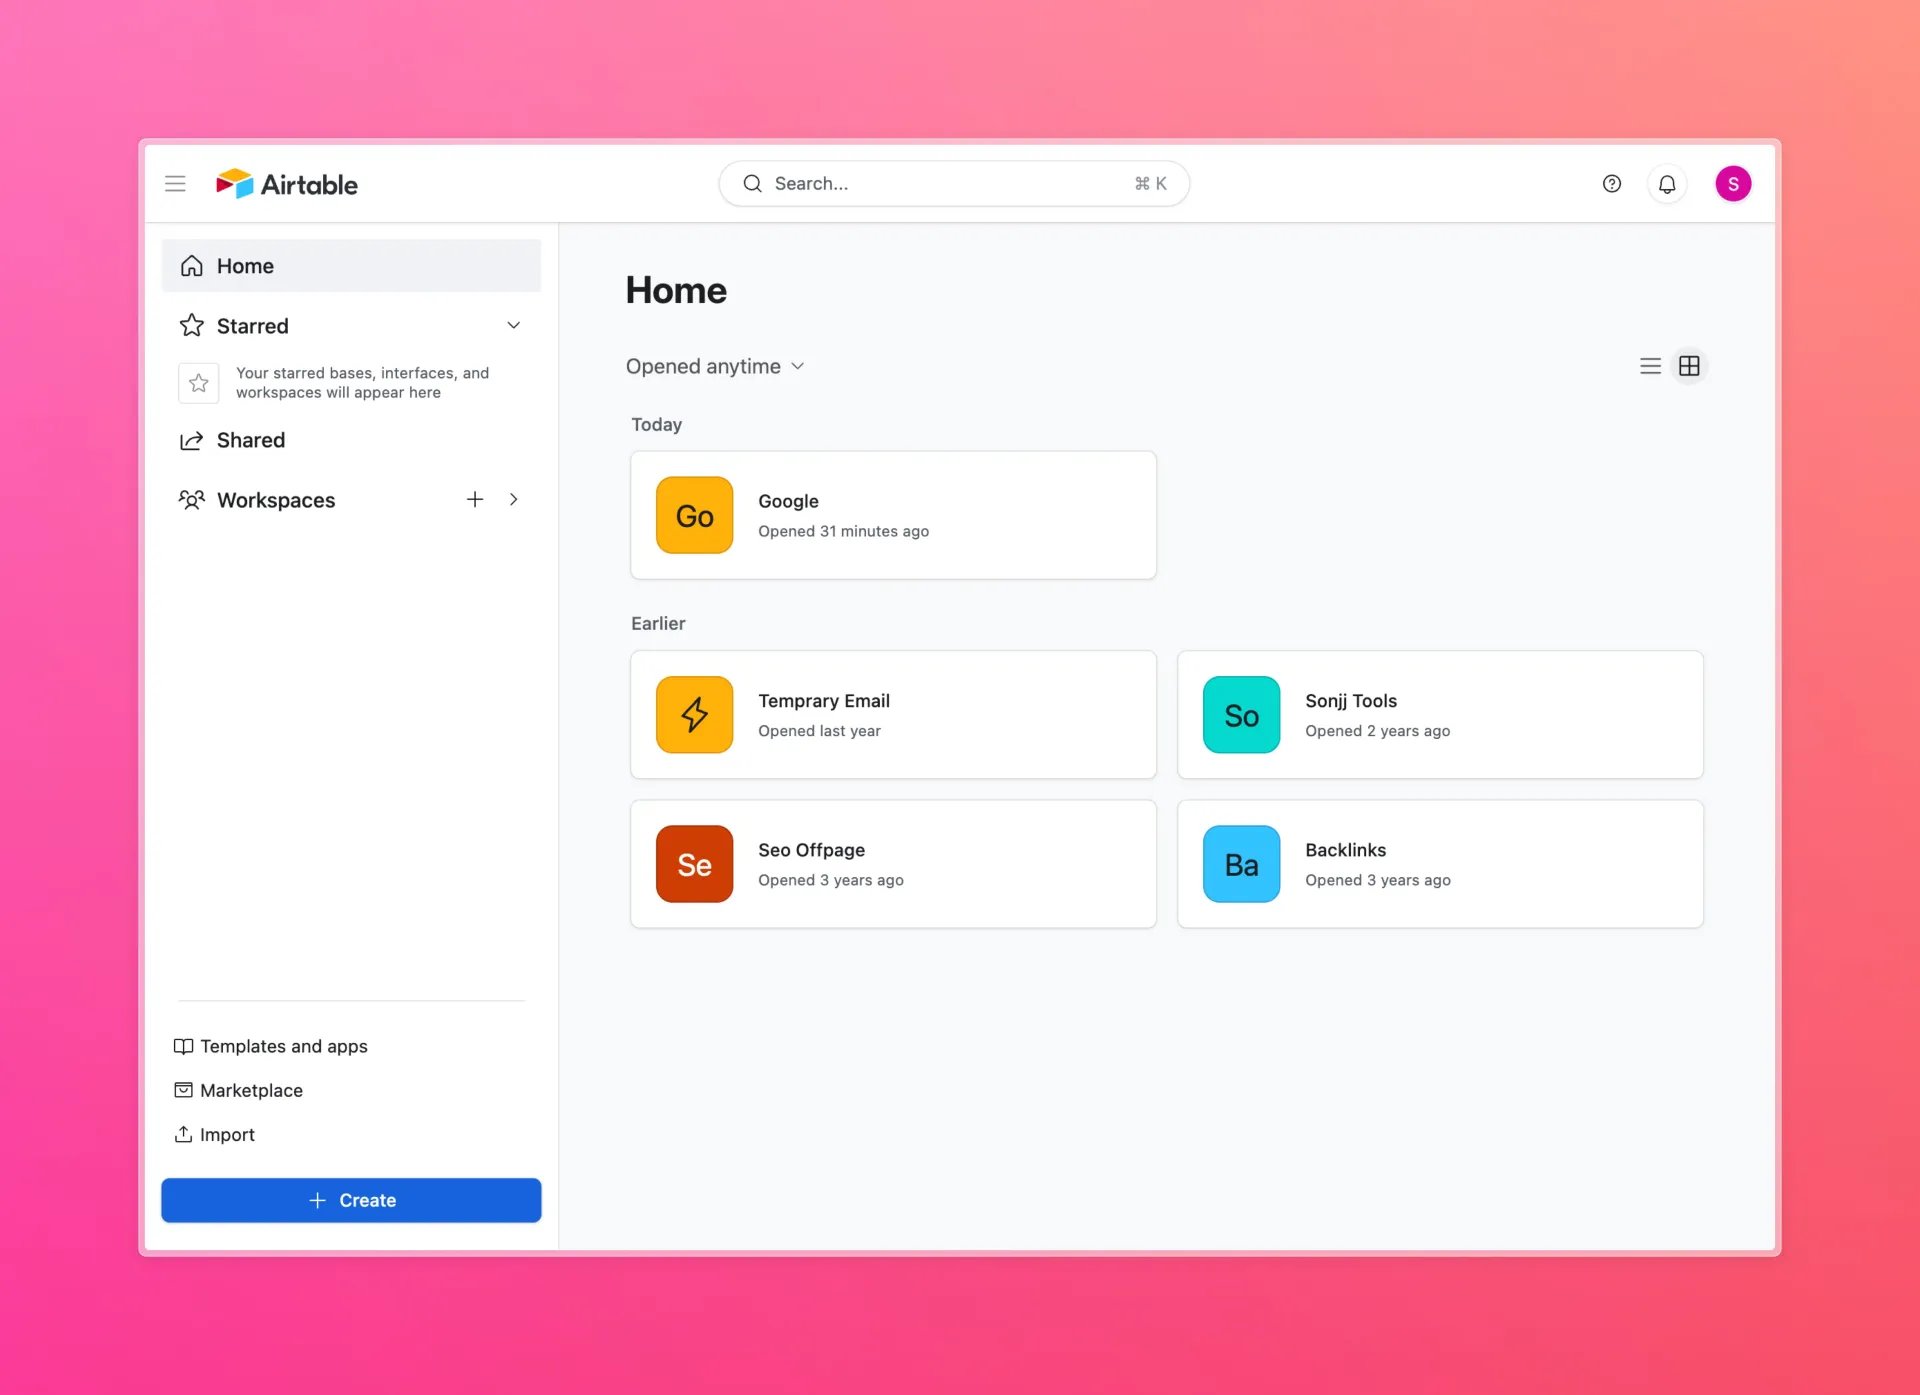
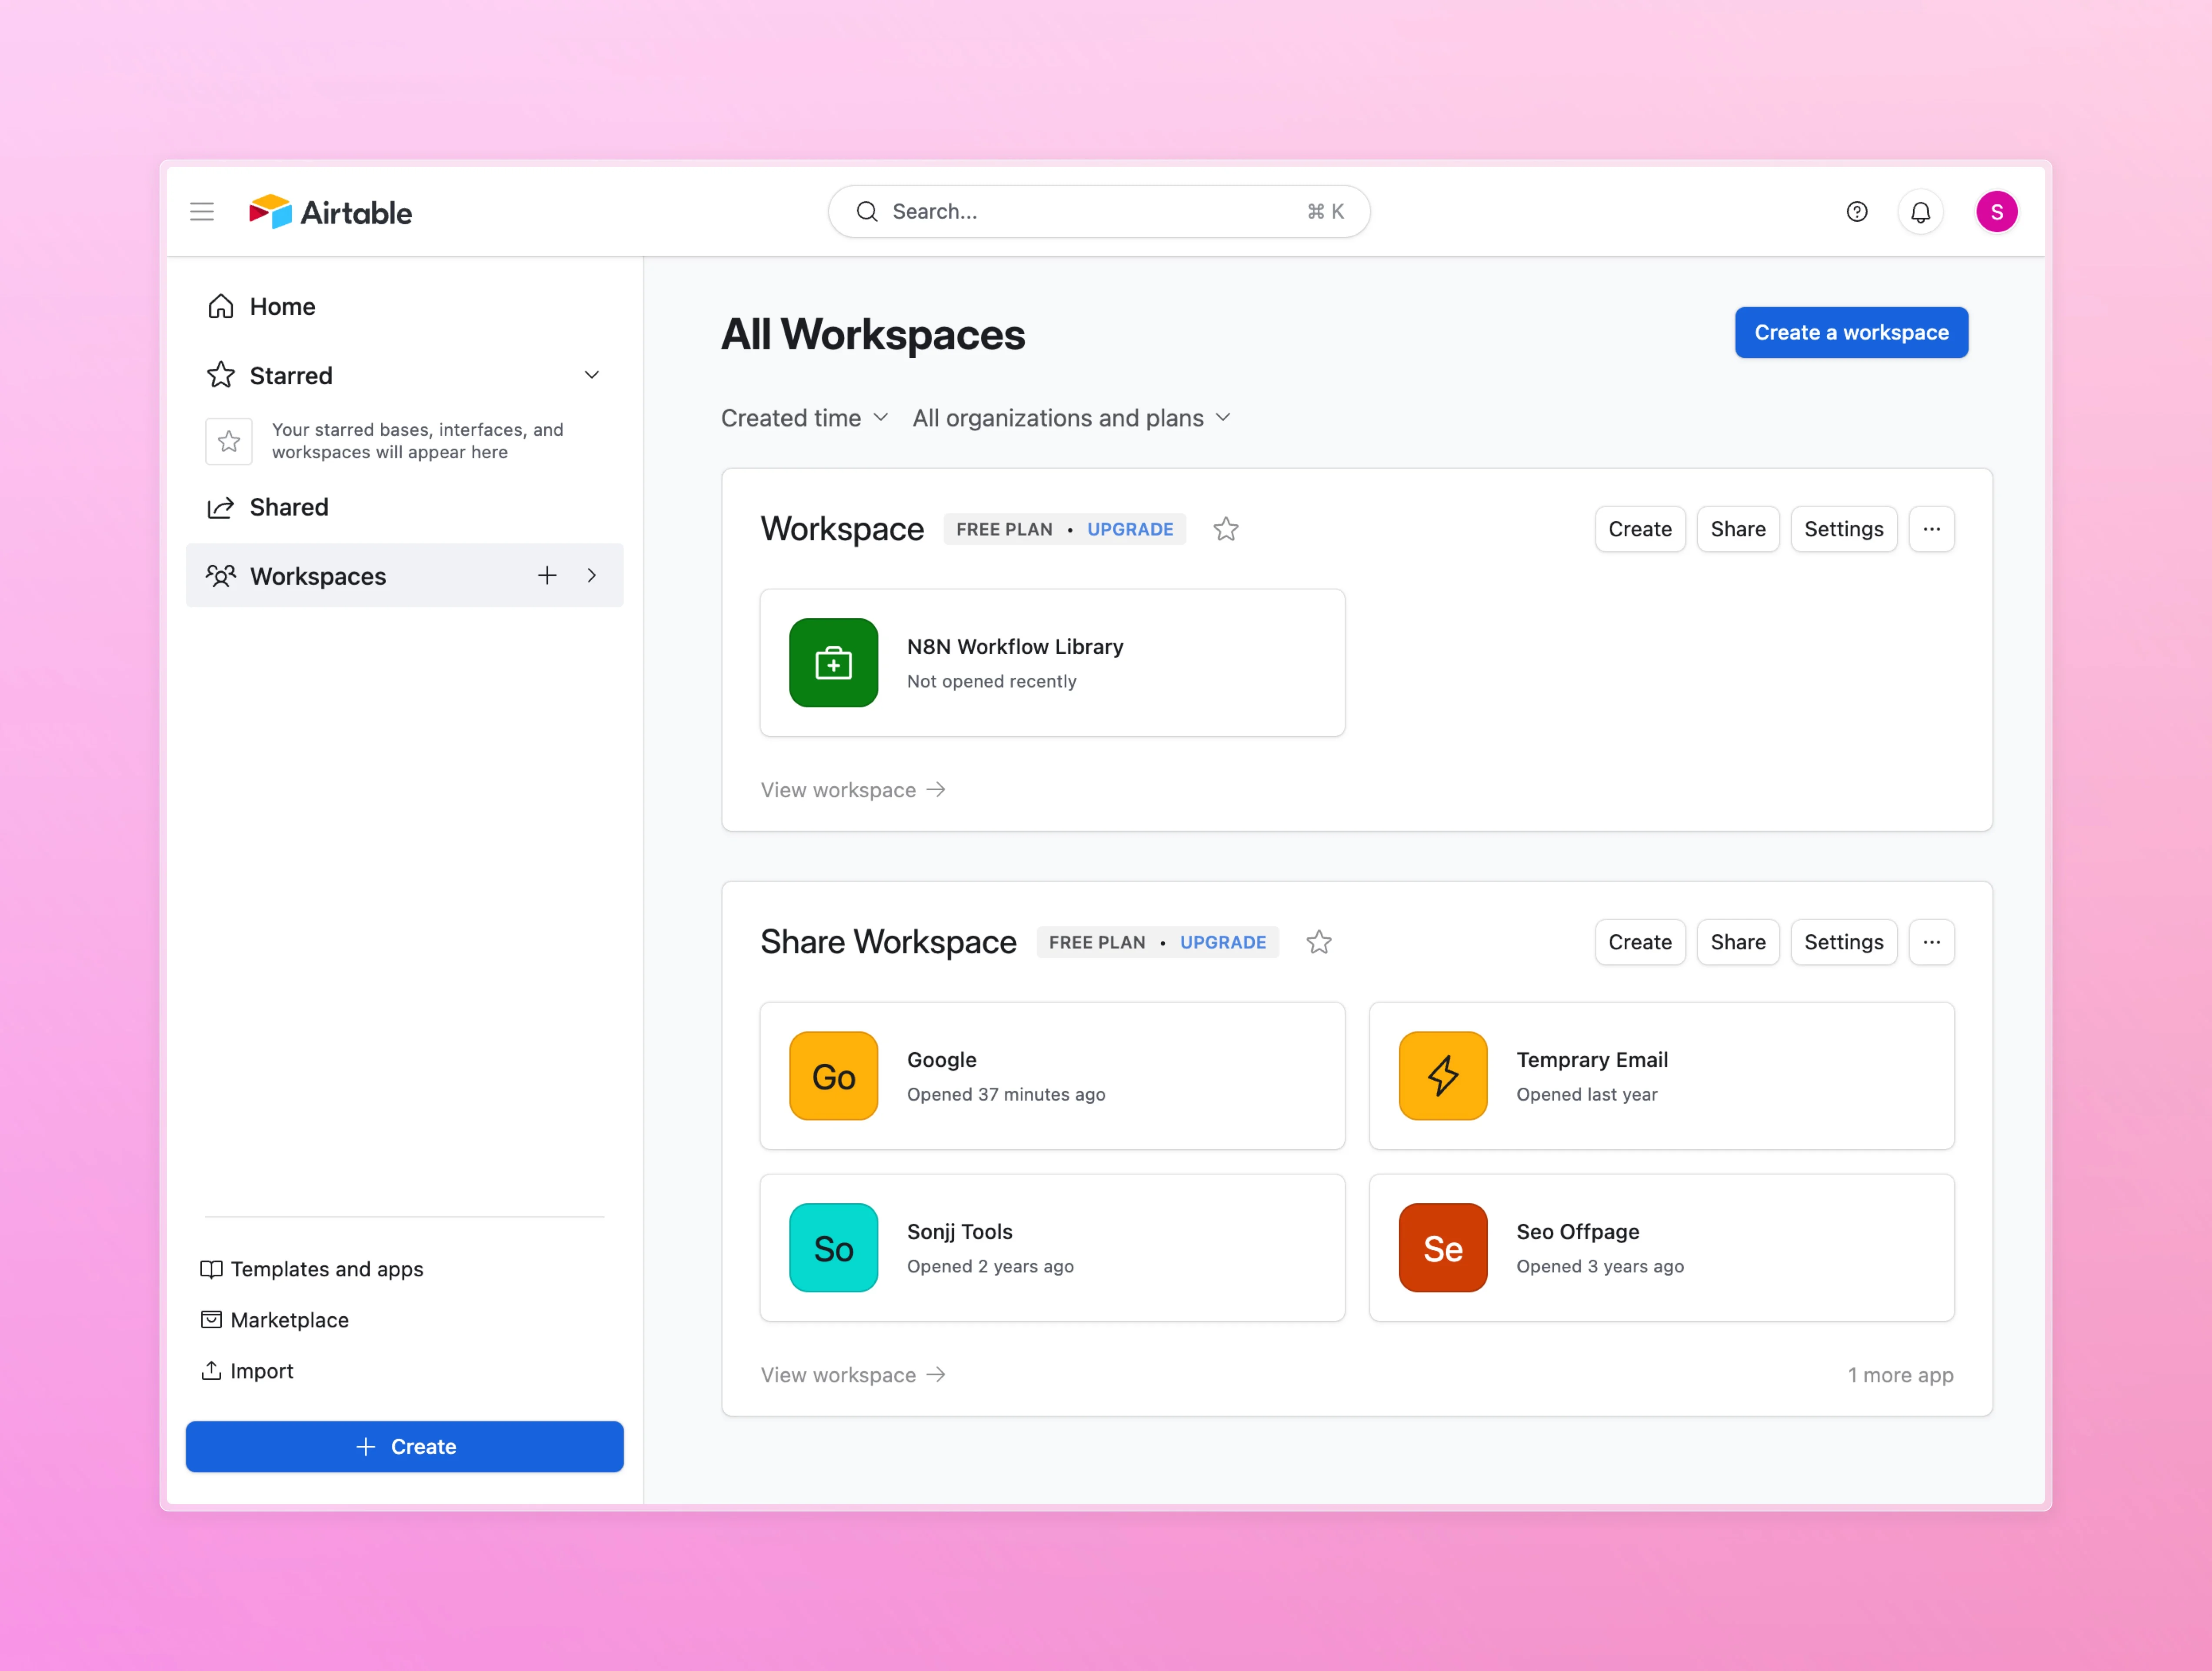
Once you're in, you'll see the main dashboard — where all your workspaces and bases live. Left sidebar shows workspaces, the center area shows your bases.
First time in, it'll look empty. Next, we'll create your first workspace and base.

Create a Workspace, Base & Table
Before creating anything, here's how Airtable structures data:
- Workspace — the top-level container, holds multiple bases
- Base — like an Excel file, holds multiple tables
- Table — a single data table (like a sheet in Excel)
- Records — individual rows in a table
That's the whole hierarchy. Now let's create your first base.
Option 1: Start from scratch
From the dashboard, click Create a base → select Start from scratch. Airtable creates a base with one default table. From there, add columns and rows however you like.
This works best when you already know what you need.
Option 2: Copy an existing template
If you're not sure where to start, templates are the quickest way in. Airtable has hundreds across project management, CRM, content calendars, and more.
Here's a real example: copying the Backup N8N template — a base I built on Airtable Universe to store n8n workflow backups.
On the template page, you can see the base structure and sample data:
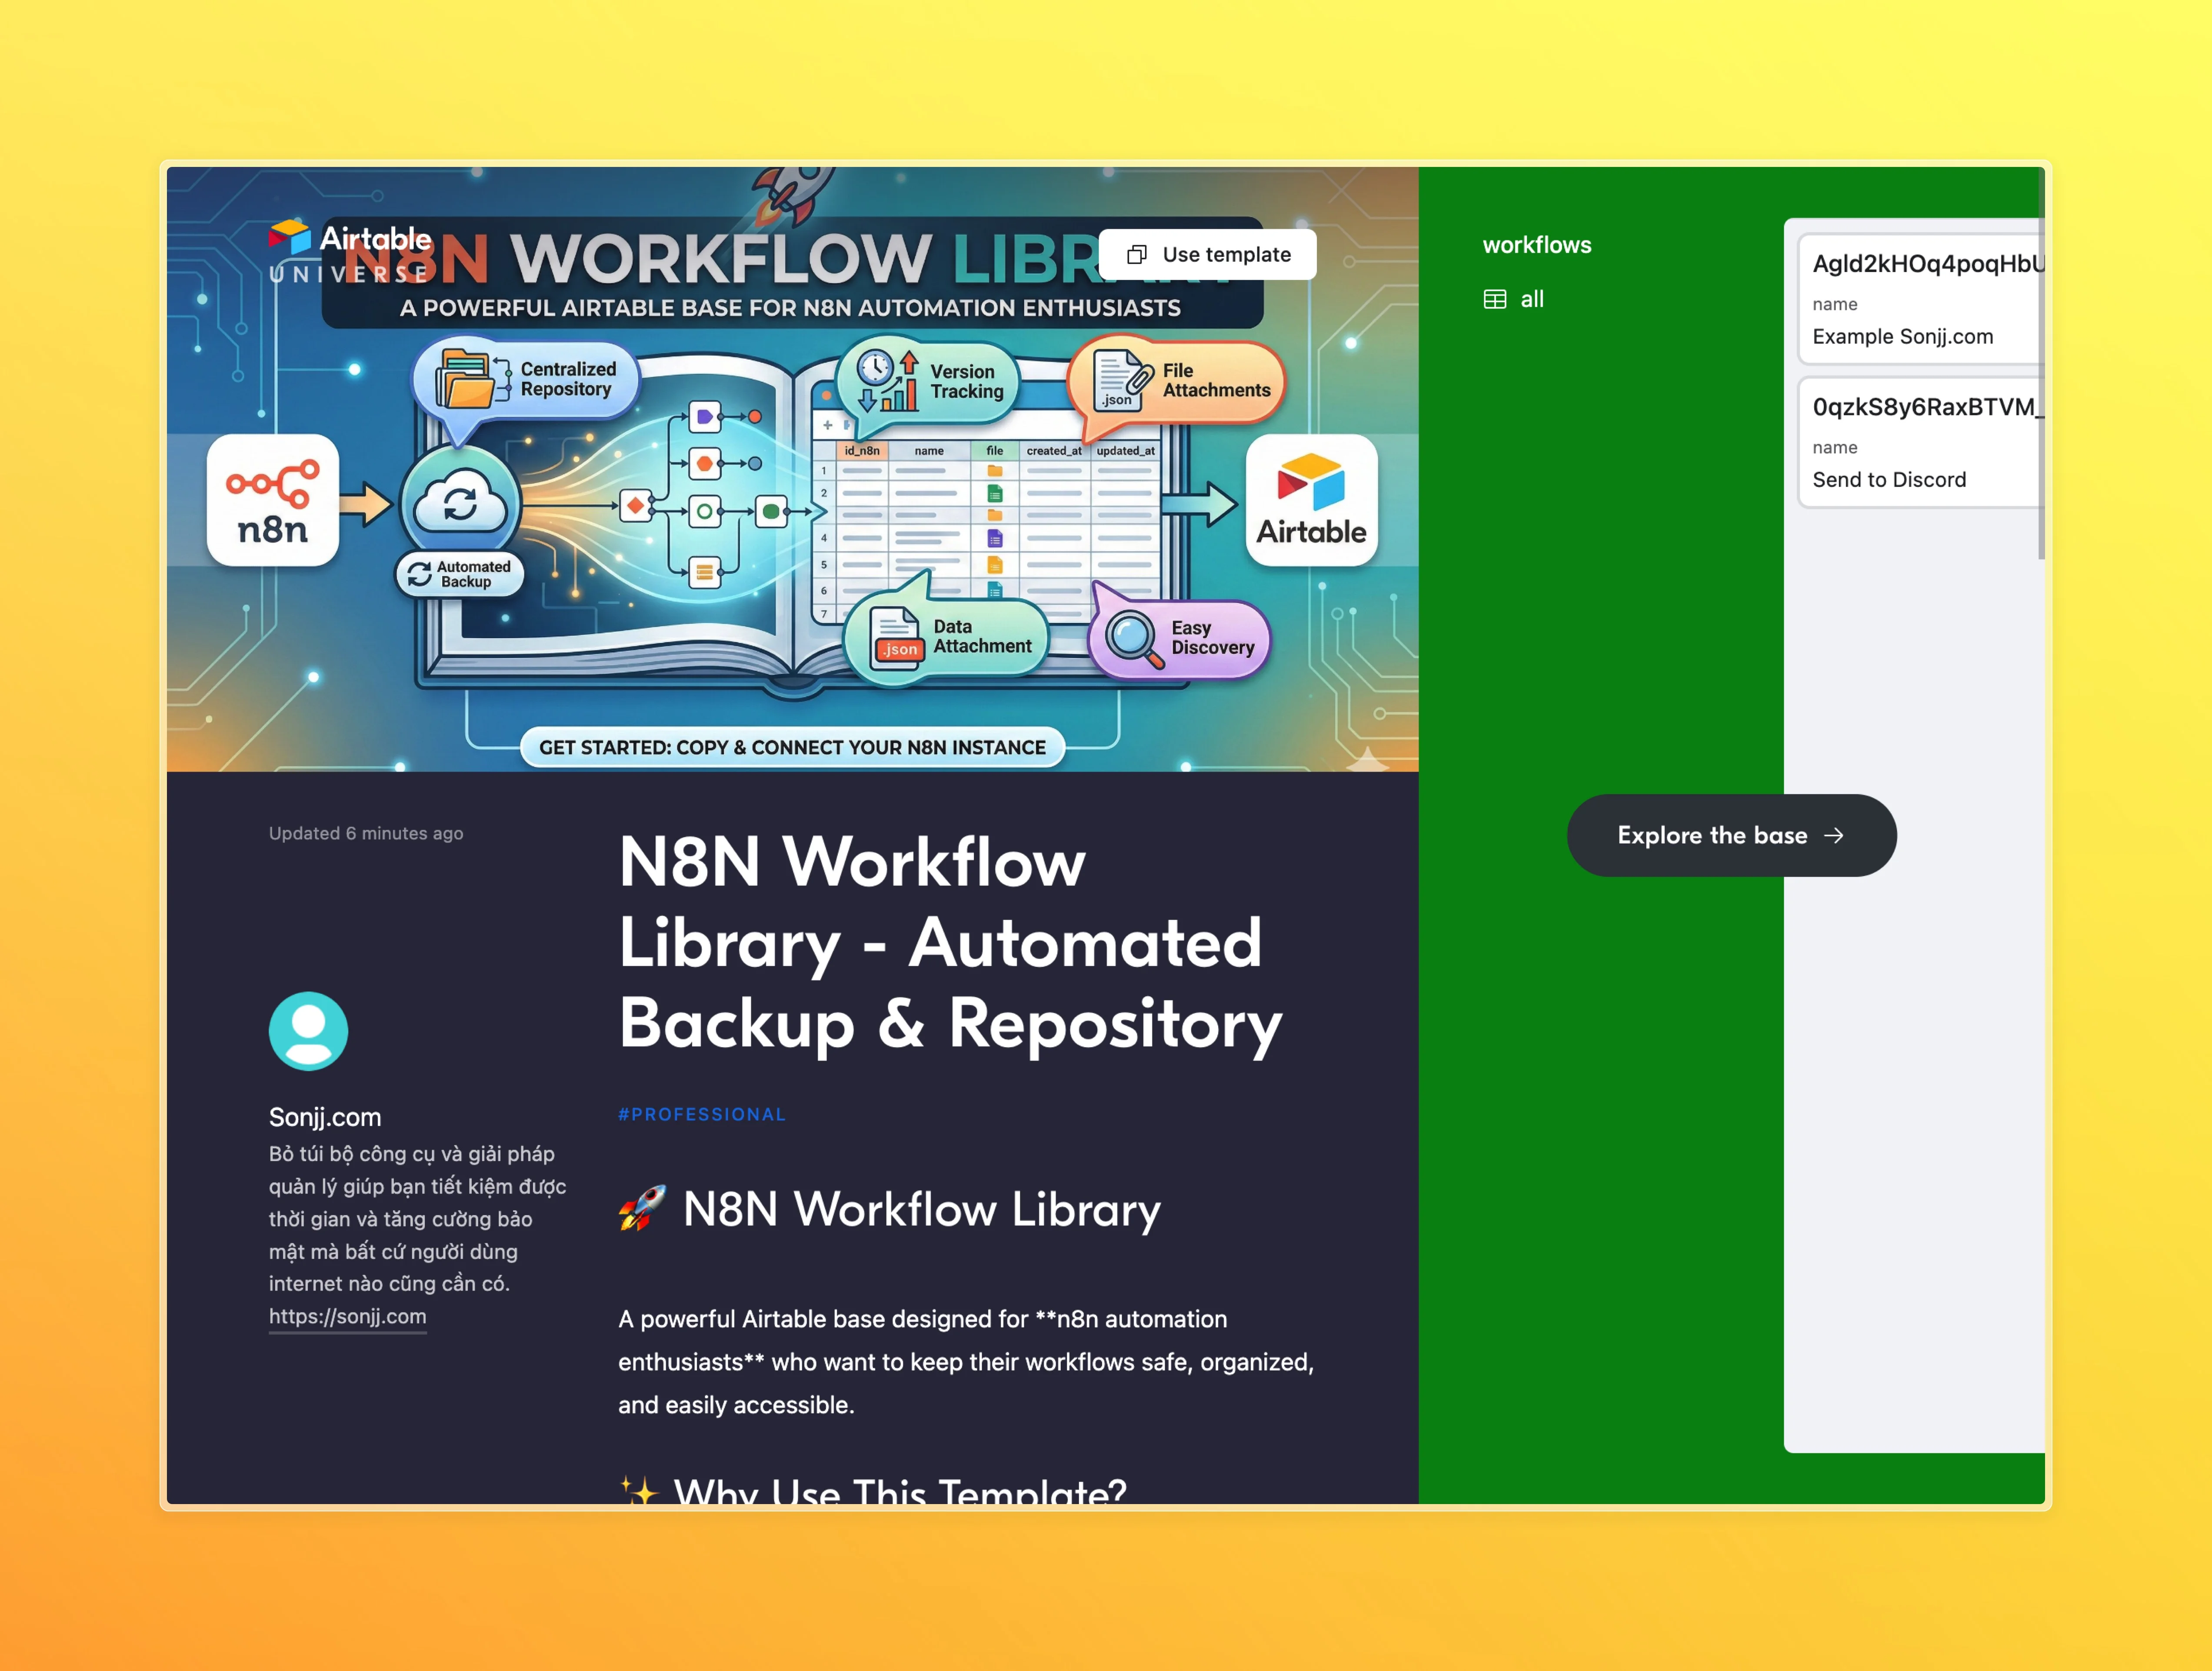
Click into the base to see details. There's a Copy base button in the top right — click it:
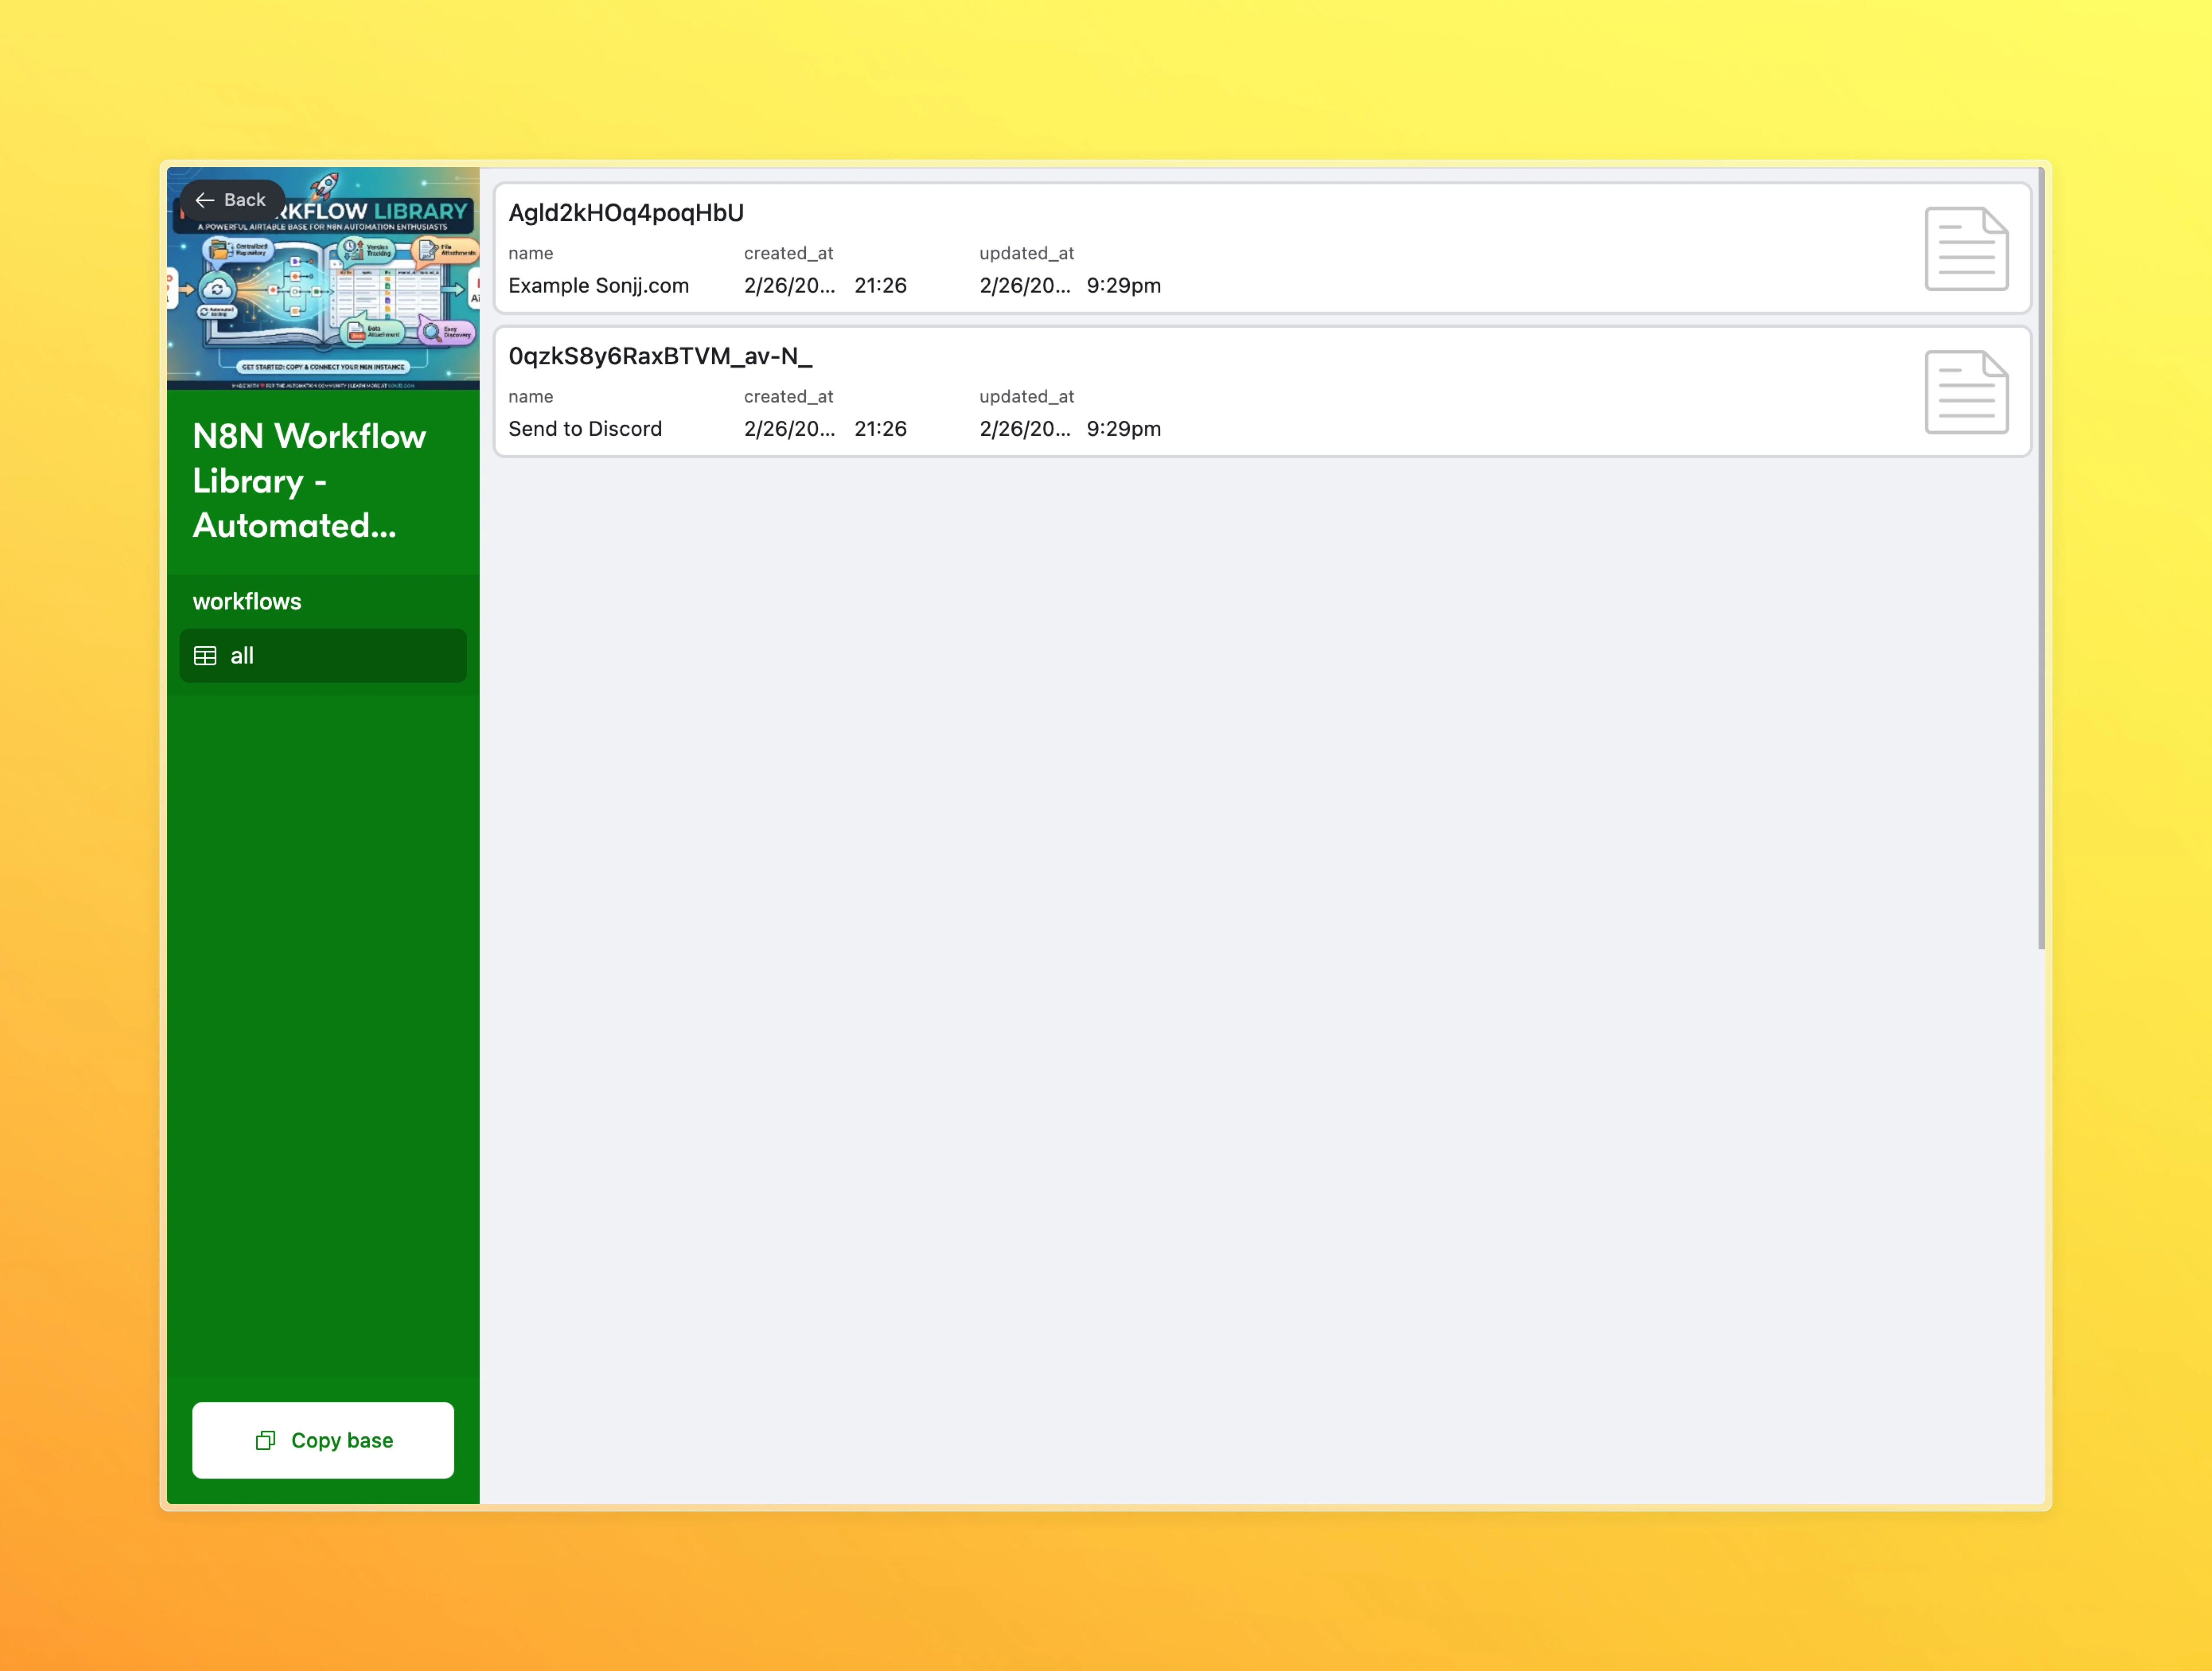
Airtable will ask which workspace to save it to. Pick yours and click Copy base:

Done. Back on the dashboard, the base is now in your workspace and ready to use:
Whether you built from scratch or copied a template, the next step is the same — get an API key to connect this base to external tools.
Get Your Personal Access Token (API Key)
This is what the whole post is building toward.
Quick reminder: Airtable dropped the old API Key in February 2024. There's now only one way to connect — Personal Access Token (PAT). Any tutorial telling you to grab an API key from Account Settings is out of date.
Step 1: Open Developer Hub
Click your account avatar in the top right → select Developer hub. This is where all your tokens live.
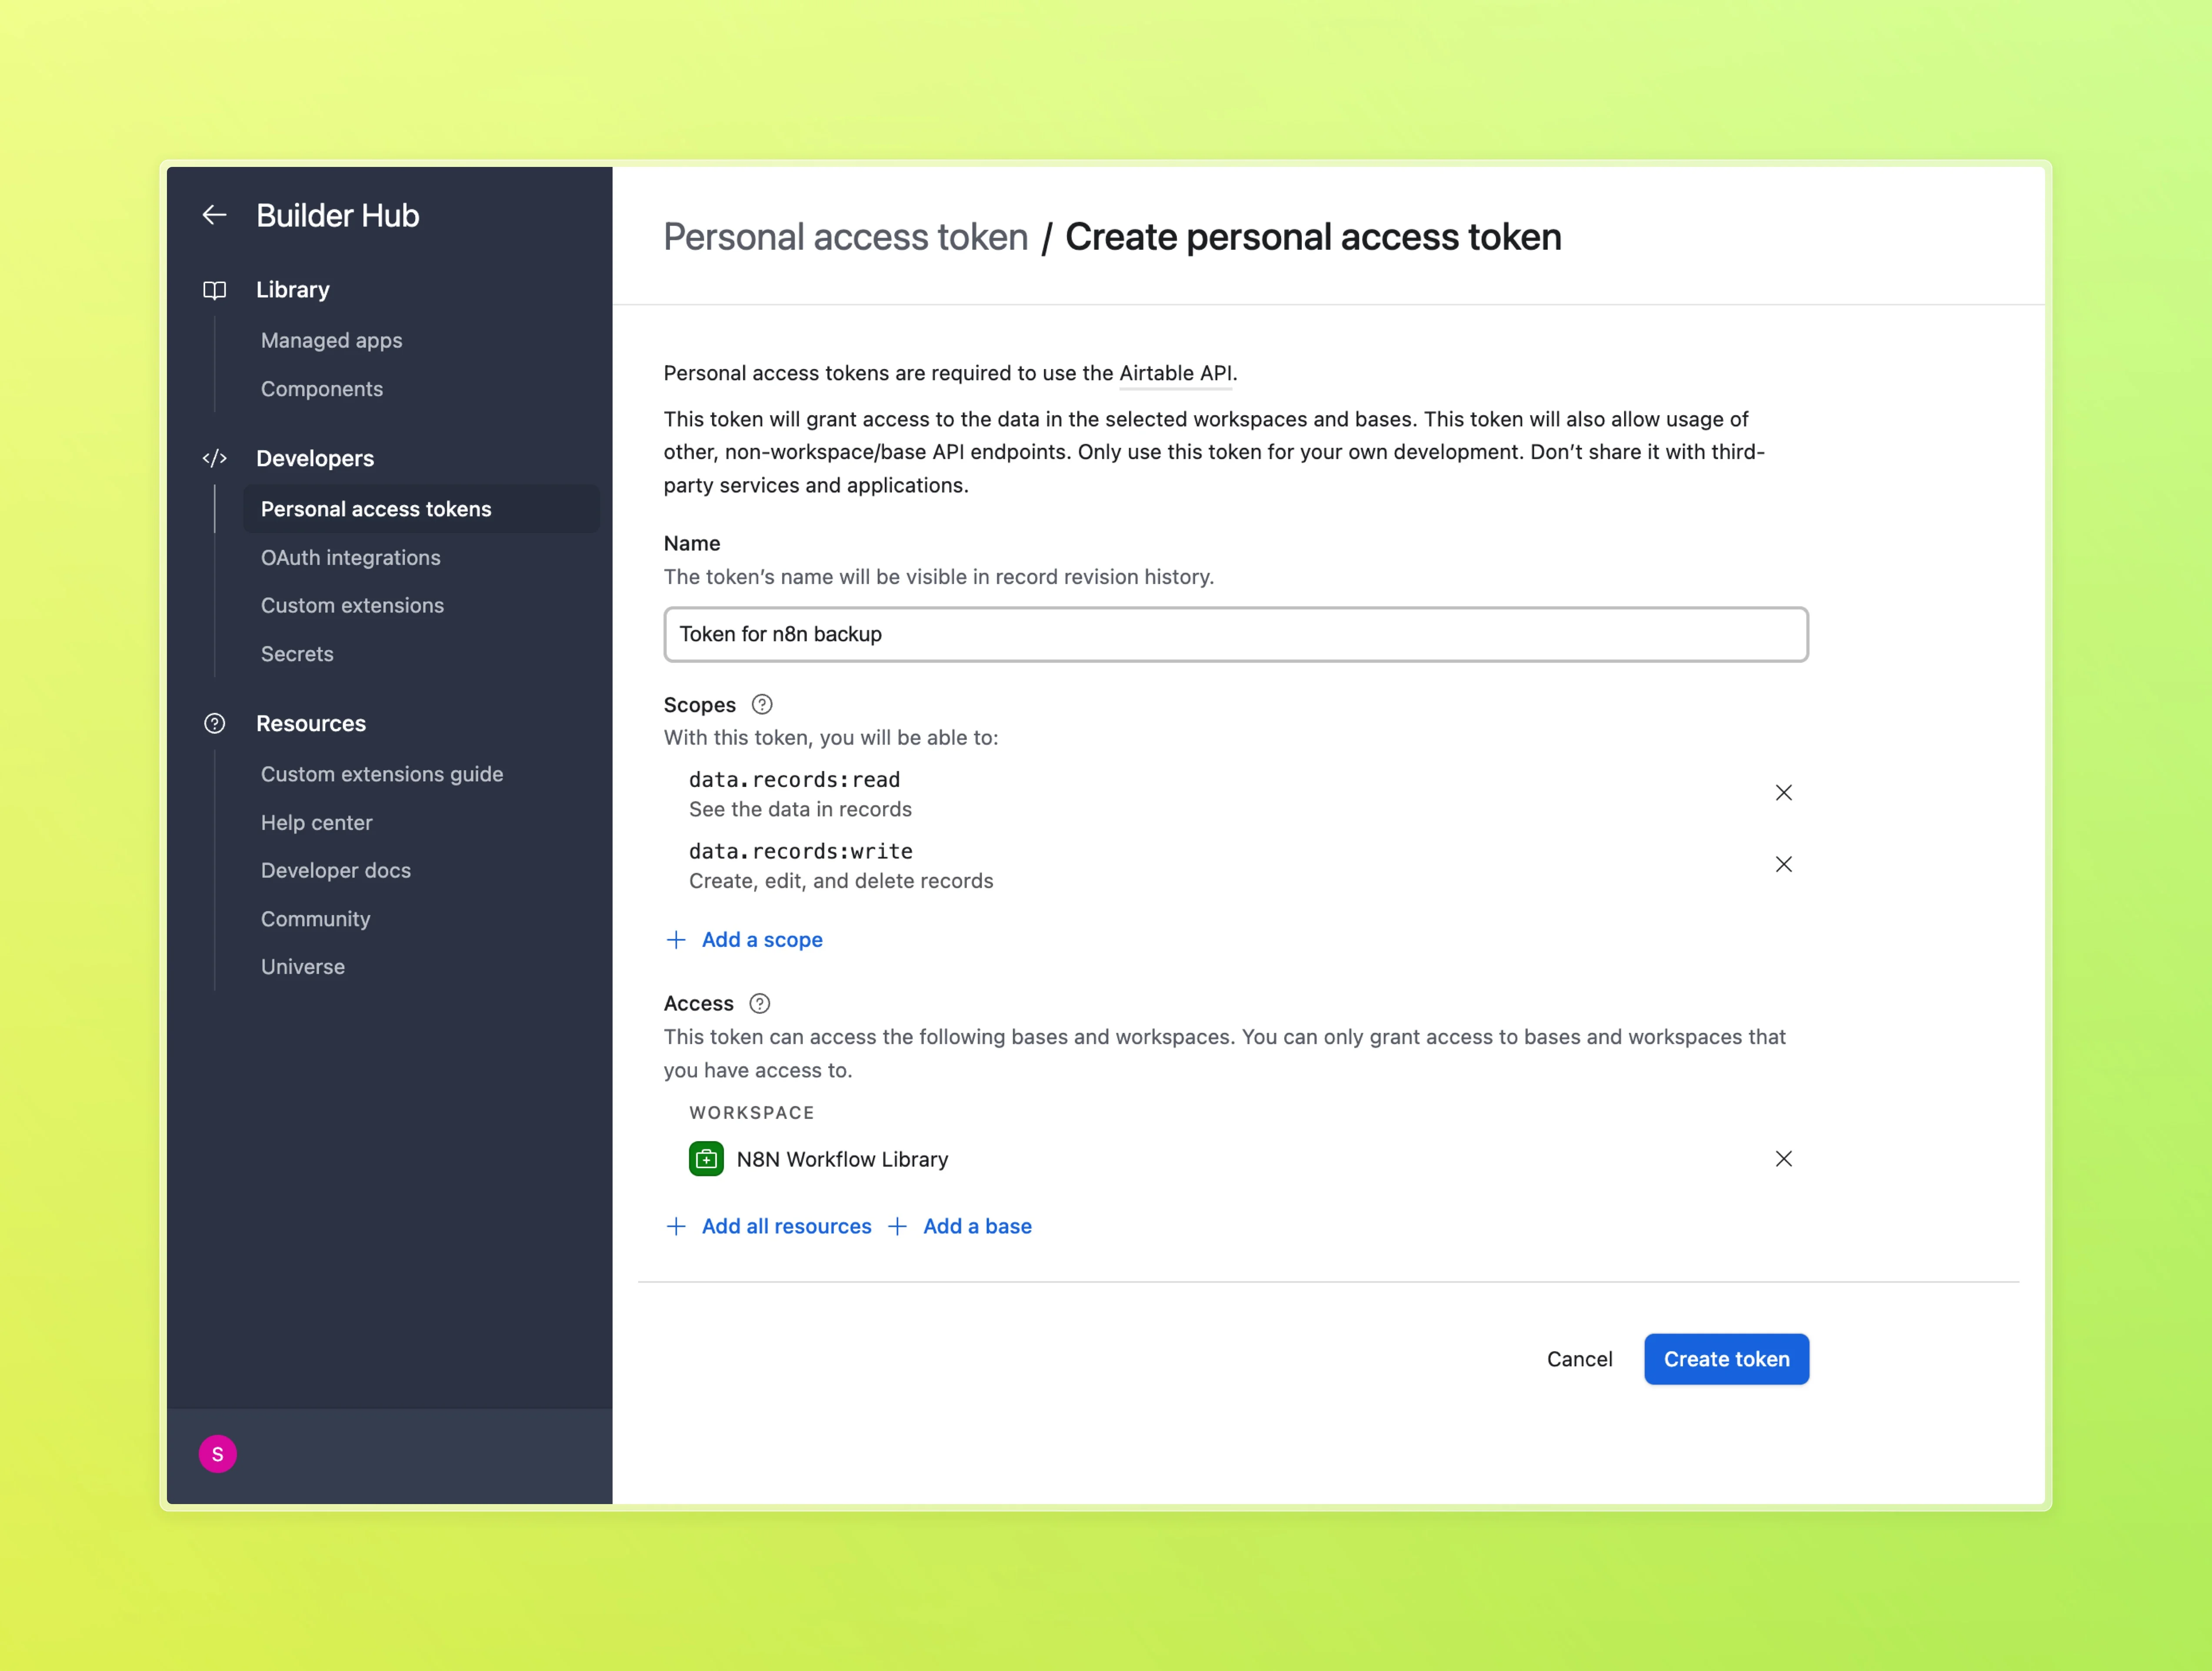
Step 2: Create a new token
Click Create new token. Airtable asks for three things:
Token name — pick something descriptive. For example:
n8n-automation— for n8n workflowschatgpt-integration— for Custom GPTsclaude-agent— for AI agents
Don't use generic names like "my token" or "test" — once you have 5–10 tokens, you won't remember which one does what.
Scopes — what the token can access. Choose just what you need:
data.records:read— read data from tablesdata.records:write— create, update, and delete recordsschema.bases:read— read the base structure (table names, field names)
These three scopes cover 90% of use cases. For n8n, ChatGPT, or Claude integrations, these are the ones to pick.
Bases — which bases this token can access. You can choose "All current and future bases" or specify individual ones. I'd recommend picking specific bases if you know what you need — it's safer.
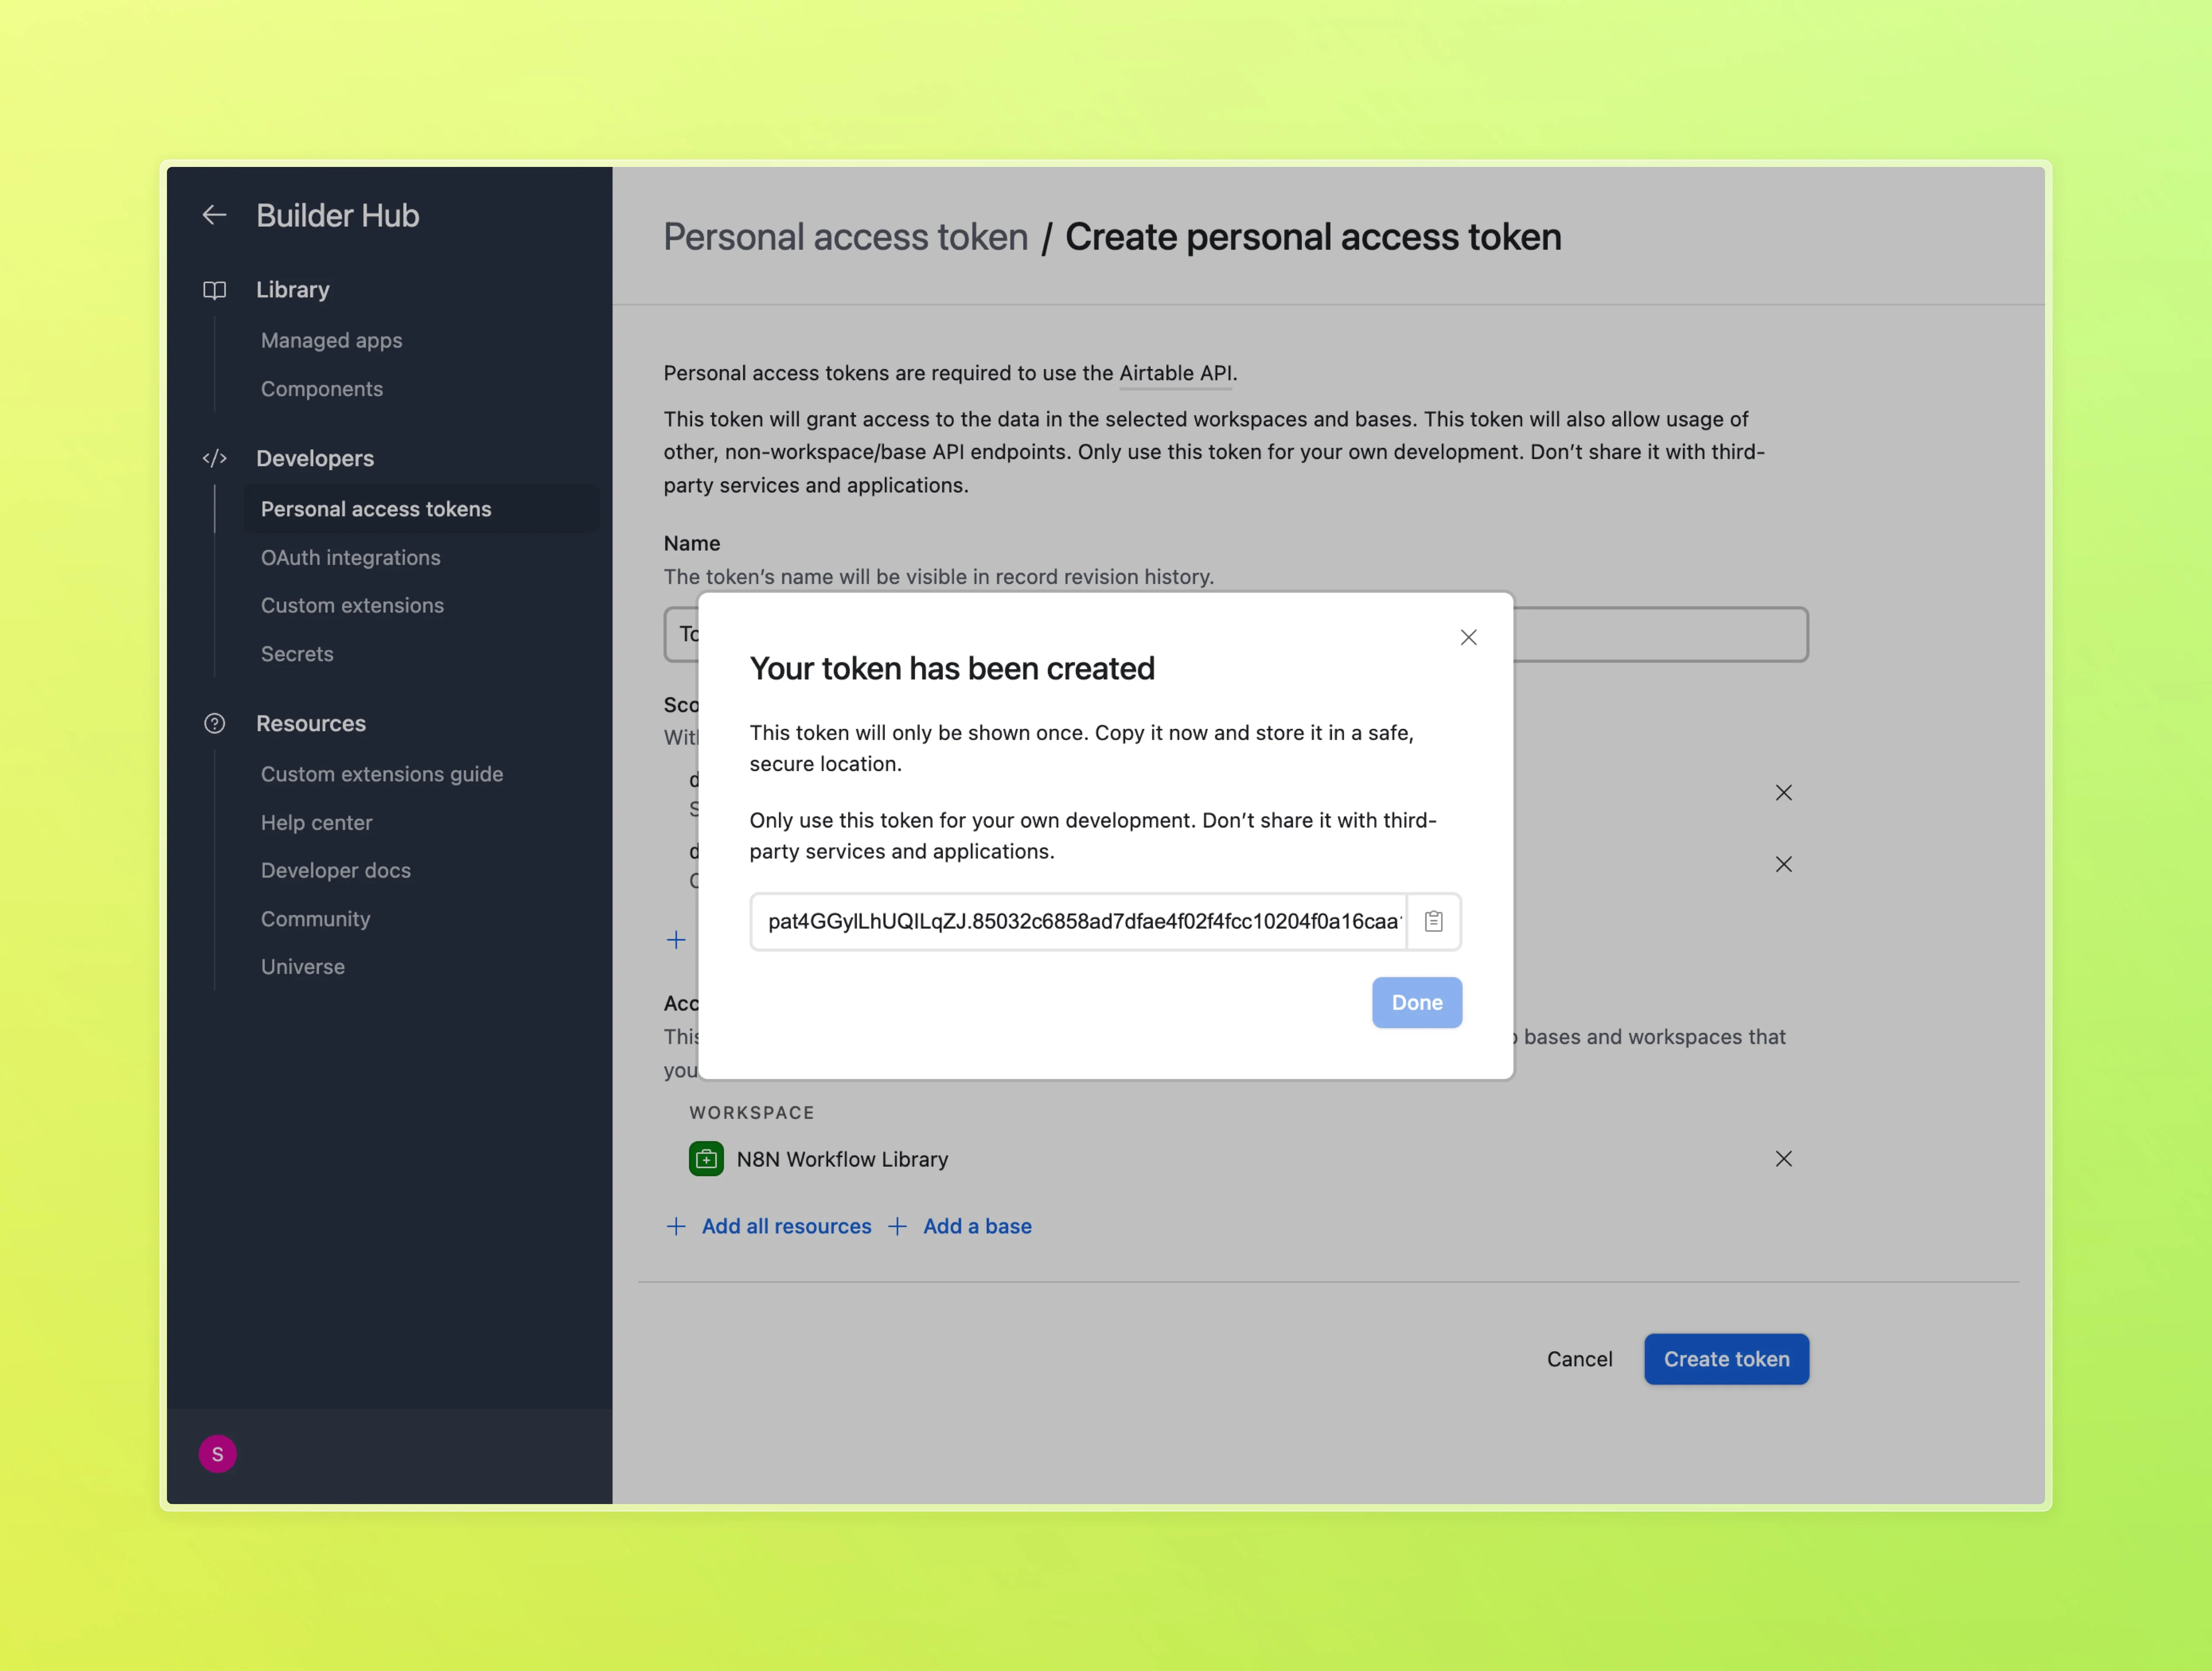
Step 3: Copy the token immediately
After clicking Create token, Airtable shows the token exactly once. No "show again" button. No recovery option. If you forget to copy it, you'll have to delete the token and start over.
Copy the token, store it somewhere safe (a password manager, a private file), then paste it into whatever tool you're connecting to.
Token security
A few rules worth keeping:
- One token per purpose — don't share a token between n8n and ChatGPT. Create separate ones so you can revoke them individually without breaking everything else.
- Token leaked? Revoke it immediately. Go to Developer Hub, delete the token, create a new one. Takes 30 seconds.
- Don't commit tokens to code — if you're writing code, store tokens in environment variables, never paste them directly into source code.
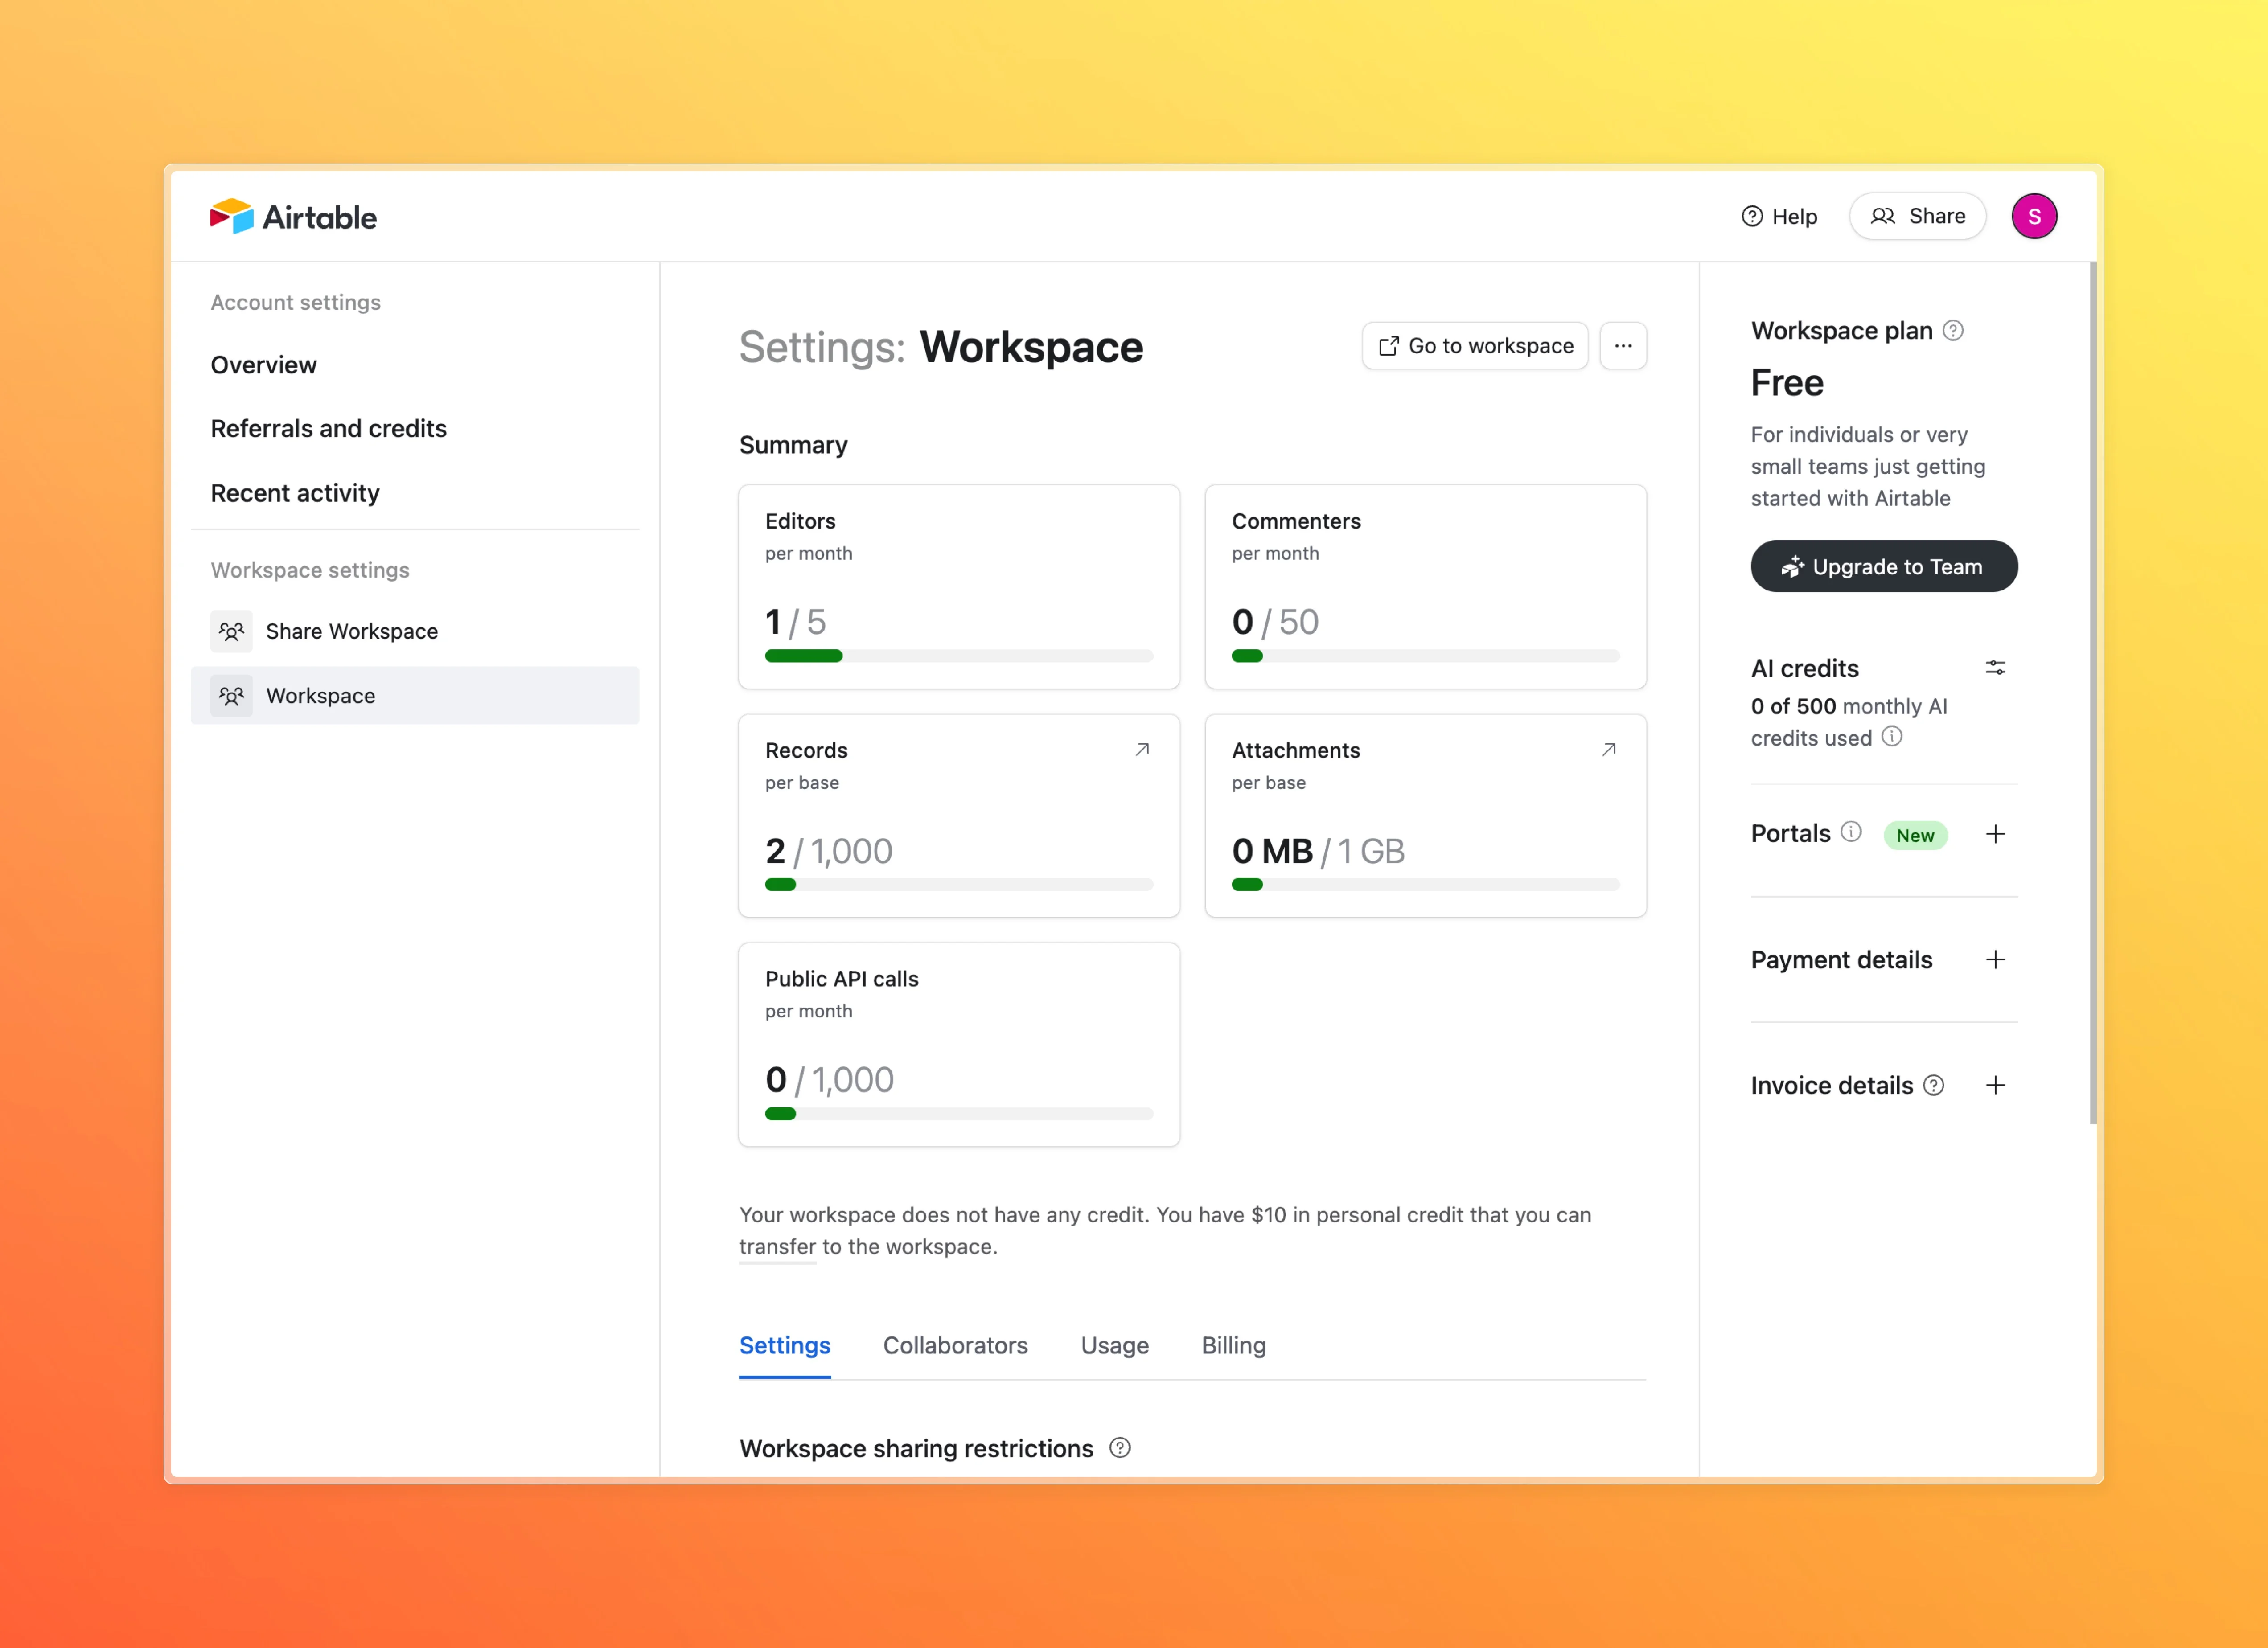
Free Plan Limits
Now that you have a token, here's what Airtable's free plan allows — it's honestly enough for most people getting started, but good to know upfront:
- 1,000 records per base — plenty for side projects, task management, or personal content planning
- 1,000 API calls per month — each read/write from n8n or ChatGPT counts as one call; for simple workflows, this goes a long way
- 5 requests per second — this rate limit applies to all plans, including paid ones
- 5 editors per workspace — fine for solo work or small teams
- 100 automation runs per month — this only counts Airtable's built-in automations; if you're running workflows through n8n externally, this number is irrelevant
If you're just getting started with Airtable to connect it to n8n or an AI agent, the free plan is more than enough. Don't rush to upgrade. Use it until you hit the limits — by then, you'll know exactly what you need, and the upgrade decision will be a lot easier to make.
What's Next
That's it. You now have:
- An Airtable account
- A workspace and your first base
- A Personal Access Token with the right scopes
Those three things are enough to connect Airtable to anything. The setup is a one-time thing — from here on, whenever you need a new integration, just create a new token.
Where you go next depends on what you want to use Airtable with:
- n8n — automate workflows and sync data between apps
- ChatGPT / Claude — use Airtable as memory for AI agents
- Zapier / Make — quick no-code connections
I'll have separate guides for each — all starting from where this post ends.
No spam, no sharing to third party. Only you and me.